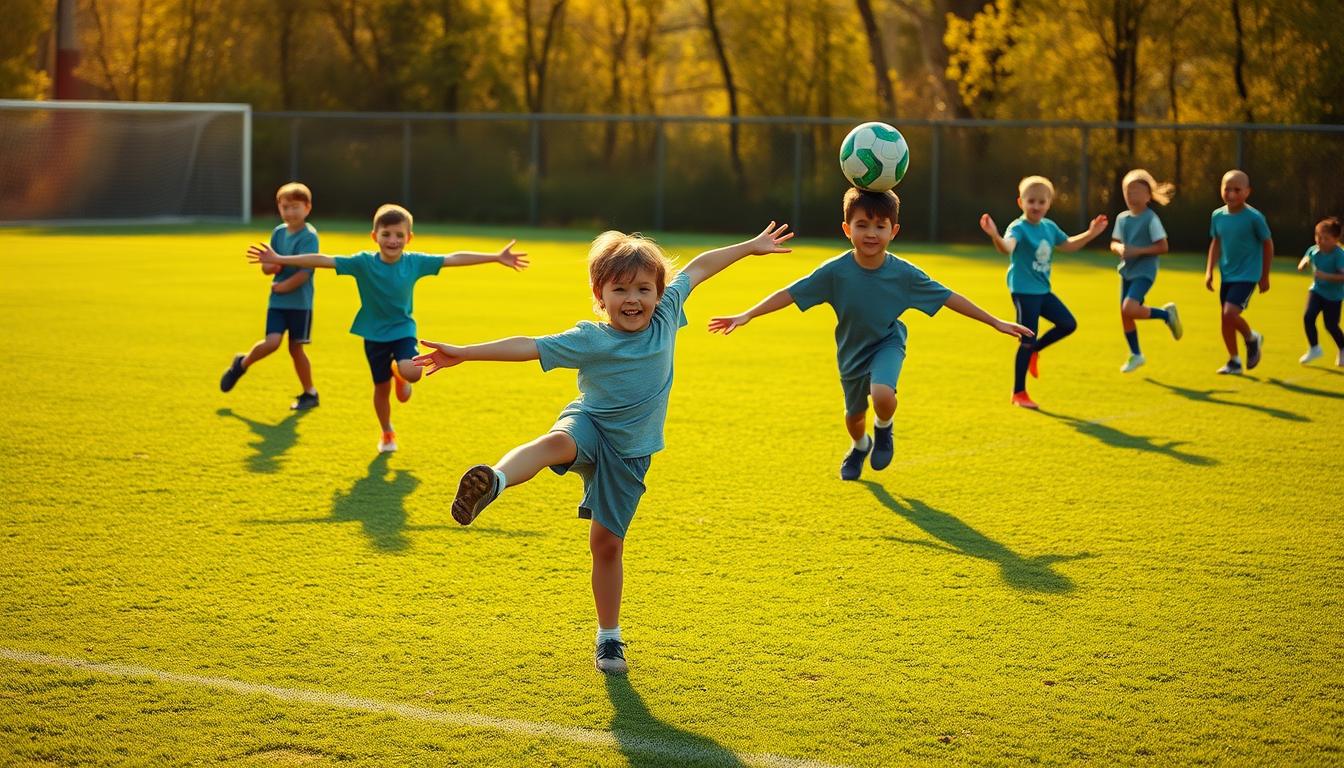
Balance Exercises for Kids Soccer
Can a few simple steps make young players feel steady and confident on the field?
I set a clear goal: help you build better balance and coordination in a way that fits busy family schedules. I show short drills that need only a ball and a few cones. These drills link steady plant-foot work to sharper passes and cleaner shots.
Good posture and a quiet plant foot help a child place the ball where they aim. Training on slightly unstable surfaces also wakes up muscles, tendons, and skin to improve spatial awareness. I explain safe progressions so players gain skill without risk.
You can run these blocks at home or on the field. I keep cues simple: head up, quiet plant foot, and short sets. If you want help with footwork and quick movement, see a practical guide on improving footwork.
Key Takeaways
- Short, simple drills build steady plant-foot habits and better ball control.
- Progress difficulty slowly and avoid training when tired.
- Use cones and a ball to teach coordination in short sessions.
- Focus on posture cues like “head up” and “quiet plant foot.”
- Unstable surfaces can help youth improve spatial awareness safely.
Why balance and coordination matter for youth soccer today
Stability and fast reactions shape nearly every on-field touch and pass. Players shift weight after jumps, turns, and contact. Small foot placement changes decide a finish, cross, or controlled pass.
Good posture and steady feet link directly to ball skills. When a child keeps the head up and a quiet plant foot, the first touch is cleaner. That same steady base improves shooting accuracy and passing pace.
- Better coordination improves first touch because the plant foot stays still and the touch is clean.
- Strong stabilizers reduce injuries by resisting awkward twists and slips.
- Faster reactions cut collisions and speed recovery after contact.
- Short training blocks with taps and one clean touch help transfer skill to games.
Injury context and simple gains
A Pediatrics review found large increases in soccer-related injuries treated in U.S. emergency departments between 1990 and 2014. Work on stabilizers and spatial awareness lowers that risk by improving posture and reaction.
| Area | Benefit | Practical cue |
|---|---|---|
| First touch | Cleaner control, fewer lost possessions | Head up, quiet plant foot |
| Shooting | Improved accuracy and contact point | Firm plant, clear weight shift |
| Injury reduction | Stronger stabilizers, faster recovery | Short coordination training sessions |
Core principles: static balance, dynamic balance, and spatial awareness
Holding still and moving well are two sides of the same skill set. I break this into three clear ideas you can teach in short sessions.
Static vs dynamic made simple
Static means holding a steady position. A child stands on one foot without wobble. Cue: “quiet foot, tall body.”
Dynamic means staying steady while moving. Think cuts, turns, or a short run with a pass. Start with small movements. Cue: “soft knees, quick toe.”
Spatial awareness and body control on the field
Spatial awareness is how the body senses position and movement in space. Training on slightly unstable surfaces sharpens that sense in muscles, joints, and skin.
- I teach static first, then add dynamic drills that shift weight without losing control.
- Body position matters: hips face the play, chest tall, eyes forward to guide the foot.
- Short, safe work improves ball control by keeping the plant side firm during a touch.
Keep progress slow. Build time and difficulty gradually. Stop before fatigue and avoid early jumps to reduce injuries.
Safety, setup, and equipment for home and field sessions
Start each session by checking the surface and gear so practice stays safe and clear.
Pick a flat, dry field or indoor space to protect the body from slips. Check footwear and remove hazards like toys or wet spots before you begin.
Safe surfaces, cones, wall, and soft pads
Use cones to mark lanes and safe zones. That keeps movement simple and reduces collisions.
A clean wall works as a rebounder when space is tight. Place the ball nearby so you can move from holds to passing quickly.
Add a balance pad or soft mat only after basic control is steady. Pads challenge balance coordination without added impact.
Session length, rest, and age-appropriate intensity
- Plan time in blocks: 5–8 minutes per block with short rests to keep quality high.
- Match the level: if a child wobbles, slow the move, lower speed, and shorten holds.
- Use these tips each set: check posture, keep the plant foot quiet, breathe, and stop before fatigue.
- Never start with jumping. Increase difficulty gradually and repeat regularly to reduce injuries.
Quick checklist: dry surface, cones set, wall in reach, pad ready, ball close, sensible time and age rules.
Warm-up to prime feet and body control
Begin with gentle moves that prime the feet and steady the head. I keep this warm-up short so the body wakes up without fatigue.

Light footwork: toe walks, heel walks, ankle circles
- Toe walks: rise on toes and walk 10 yards, slow and steady to wake calves and toes.
- Heel walks: lift the toes and walk 10 yards to engage shins and ankle control.
- Ankle circles: stand tall and draw slow circles to prep movement at the joint.
Head turns and arm swings to challenge posture
- Toe taps on a still ball: light taps for 20 seconds to match rhythm and breath.
- Arm swings: swing forward and back while standing tall to test posture control.
- Head turns: hold a stance and turn the head left and right to challenge balance.
- March holds: lift a knee, pause, switch, keep hips level for clean alignment.
- Short mobility: smooth hip, hamstring, and groin movement—no rush.
Keep the time tight: 5–7 minutes is enough to raise warmth and focus without fatigue. Never start with jumps. Finish with one simple ball touch drill to link balance and control before training.
| Warm-up item | Purpose | Cue |
|---|---|---|
| Toe walks | Activate calves and toes | Slow, high toes, steady posture |
| Head turns | Challenge posture and coordination | Eyes forward, turn smooth |
| Toe taps on ball | Link feet rhythm with breath | Light taps, 20 seconds |
Soccer balance exercises for kids
Simple ball work builds quick feet and steady posture in minutes each day.
Toe taps and foundations for quick feet
Toe taps: place the ball under you. Tap the top with your toes, light and quick, 20–30 seconds. Rest. Repeat two rounds.
Foundations: roll the ball between feet with small touches. Keep your head up and the ball close. This builds rhythm and ball control.
One-foot holds with ball touches
Stand on one leg. Tap the ball gently with the free foot, then switch. Progress by adding a slow head turn while the standing limb stays quiet.
Cone weave with soft touches
Set four cones in a line. Dribble with soft touches and weave in and out without hitting a cone. Make gaps wider for speed, tighter for close control.
Wall pass balance hops
Pass to the wall, hop once on the plant side, control the return touch. Repeat in short sets. Add a weak-foot set to build control and coordination.
- Keep each drill short: 2–3 rounds of 20–30 seconds.
- Cue every rep: “head up, soft touch, quiet foot, breathe, enjoy your work.”
| Drill | Purpose | Set |
|---|---|---|
| Toe taps | Quick contacts, rhythm | 20–30s ×2 |
| Cone weave | Close control, speed options | 20–30s ×2 |
| Wall pass hops | Stabilizers, return control | 20–30s ×2 |
Unstable surface drills to boost coordination and control
A soft pad and short holds can wake the small stabilizer muscles that help a child stay steady during play.
I start beginners on one foot on a soft surface. Hold 10–15 seconds, then switch. Keep a tall body position and calm breaths.
Single-leg stance with arm movements
Raise arms forward or sideways while the standing foot stays quiet. Add slow head turns to challenge position. Stop at the first sign of a big wobble.
Small two-foot jumps and stick the landing
Do light running steps in place on the mat for 10 seconds to wake stabilizer muscles. Progress to mini two-foot jumps. Land soft in the center and hold the landing for two counts.
- Do not rush to one-foot jumps—wait until landings are steady.
- Vary jump height modestly and keep reps low to reduce injury risk.
- If posture drops or the child looks tired, reduce time or range.
End each set with a calm stance and deep breath to reset the body before ball work.
| Drill | Purpose | Stop rule |
|---|---|---|
| Single-leg pad hold | Activate small muscles, test one foot control | Stop if wobble increases or posture collapses |
| Arm movements in stance | Increase demand on the standing limb and body position | Stop if child loses foot control or feels unstable |
| Two-foot mini jumps | Teach soft landings, absorb force safely | Stop when landings are noisy or knees lock |
Coaching cues, progressions, and age-based tweaks
Small, clear prompts help a young player focus and improve during short drills. I keep language simple so a youth hears it and acts fast.
Quick coaching cues to use now
- Head up — eyes forward to read the play.
- Plant foot still — steady the support leg for a clean first touch.
- Soft touches — small taps to keep control of the ball.
- Breath tip: inhale before action, exhale on the touch to steady the body.
How to progress a drill
Increase time first. Add 5–10 seconds only when form stays clean.
Then change distance: widen cones to encourage speed, tighten them for close touches.
Switch to the weaker foot often so both sides gain ability.
Make training fun for ages 5–12
Use short mini-games to keep players engaged. Fox Tails, Hospital Tag, Pac Man, or Sharks and Minnows work well.
Keep the level right: if a player struggles, shorten time, simplify the drill, or add a rest.
| Item | Goal | Coach tip |
|---|---|---|
| Toe taps challenge | Quick touches, confidence | Count 20 taps, celebrate the streak |
| Cone weave | Close control under pressure | Tighten cones to slow, widen to speed |
| Weaker foot set | Even ability both sides | Half the reps on weak side each round |
Coach tips: Give specific, kind feedback: “quiet foot,” “soft knees,” “eyes forward.” Stop a drill when quality drops. End with a quick win—short toe taps or a passing streak—to boost confidence and make progress visible.
Conclusion
Short, focused sessions make real gains in posture, control, and recovery. I recommend one clear goal each time you train. Keep sets brief and fun so players stay eager and improve their ability.
Small steps matter: work on posture, a steady plant foot, and gradual progression. Combine stable ground work with a soft pad later. Use the field or a corner at home and a wall or a few cones to guide practice.
Pick one drill today, set a short timer, and enjoy the ball together. For game-style variety, try these fun soccer games to keep training playful and effective.